


Braids are timeless, and they have adorned the heads of men and women for centuries. Recognized as both historical and trendy, braids have been a topic of interest for a very long time now.
Protective styling is ultimately popular for being convenient, less-risky and providing so much versatility. Like so, box braids come in numerous colors, lengths, widths, and styles. Anyone who has ever sat through having them done knows that they’re worth keeping in for a little while. Sure, the process may be tedious & time consuming, but the outcome is always a time saver!
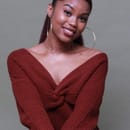
Currently, I’m sporting box braids and as someone who’s worn sets of braids for almost all my life, I’ve concluded that there really is no greater protective style for me. I love them for allowing me to safely experiment with different colors, lengths, and styles in between wearing my natural hair out.
Whenever I’m braided, I make sure to take full advantage of different looks that I anticipate pulling off. Here are a few looks to help extend the styling and wear of your box braids for date night or any day!
-
Deep Side-Parted French Braids

Styling Steps:
-
Choose a side you’d prefer for your part to be on. When it comes to side parting, my go-to is my right side, but it’s truly a matter of preference.
-
Once decided, start the part and continue to create it down toward the back of your head. Now, you will have two sides ready to be cornrowed. (Pro tip: If you have difficulty cornrowing your own hair, ask a friend or a family member if they can help!)
-
Begin the cornrow while pacing yourself to ensure neatness. I usually begin with the side closest to my part because it will have the least amount of hair to cornrow. The key for this style is to try and keep the braid as close to your hairline as possible. This is so that the direction of your braids go out and around rather than straight back.
-
Secure the ends of your braids with rubber bands or any elastics you own so that they won’t face any chances of unraveling, and you’re done!
2. Top Knot, Half Up Half Down

A top knot always says daring to me. It’s a centerpiece for your head, so, while it’s up there, you gotta make it count. They won’t tell you this in the beauty magazines but, with a bang, you’re basically unstoppable.
Styling Steps:
-
Divide the braids from ear to ear across the crown of the head. You will have a top and bottom half to work with.
-
Band the top half into a secure ponytail and let the bottom half hang.
-
For your bang, gently pull at least 4 or 5 braids from your top half, then twist them together so that they’re out of your way for now. They will be braids closest to your hairline, and be sure that they’re close together in parting too. This is so that the bang can be created with no tension.
-
Create your bun with the ponytail in your top half by winding your braids in a circular (clock-wise or counterclock-wise) motion until all ends are secured.
-
Unwind your twisted braids then gently swoop them over to whichever side you prefer. Secure your bang by winding the ends of your bang around the bun you’ve created. I suggest holding your bang in place with one hand as you wrap with the other. This is so that no braid will be pulled tighter than the other and your bang isn’t riding so high.
-
Style your braids with any clips or accessories you may have! These big clips can be found at a beauty supply store almost anywhere. It’s honestly just enough.
3. Half Up-Half Down w/ Bang

This is really just a variation of #2 that I also thought was stylish. This is a style that I consider to be a huge time saver that will still boost your cute points! Only three steps, so it’s really simple.
Styling Steps:
-
Divide the braids across the crown of your head from ear to ear, creating a top and bottom half.
-
Gently band the top half into a ponytail while leaving out at least 3 or 4 braids in the front for your bang. The bottom half will be left to hang, whether you wear them in front of your shoulders or behind them.
-
Choose a side for your bang and use clips to pin it off to a side. If you want to clip them and tuck them behind your ear, that’s another cute variation. Have fun with it!
-
Half-Up Half Down Duo Buns

Styling Steps:
-
Divide your braids across the crown of your head from ear to ear, creating a top and bottom half.
-
Leave your bottom half hanging down and split the top into two halves down the middle.
-
Gently band both halves into ponytails while leaving out at least 3 or 4 braids in the front of your head for the bang.
-
Wind the two ponytails into buns by using a circular motion until all loose ends are tucked underneath the buns.
-
Take your bang pieces and choose a side to swoop them over to. Hold the bang in place on your forehead so that it doesn’t ride or slide, then begin to wrap the ends around the bun that’s closest to your bang.
-
Secure the buns with bobby-pins and decorate your bang with clips or any accessories you may have!
Here, we have four styles that will serve all of the looks! So test the waters, your braids may actually thank you themselves. Happy styling!