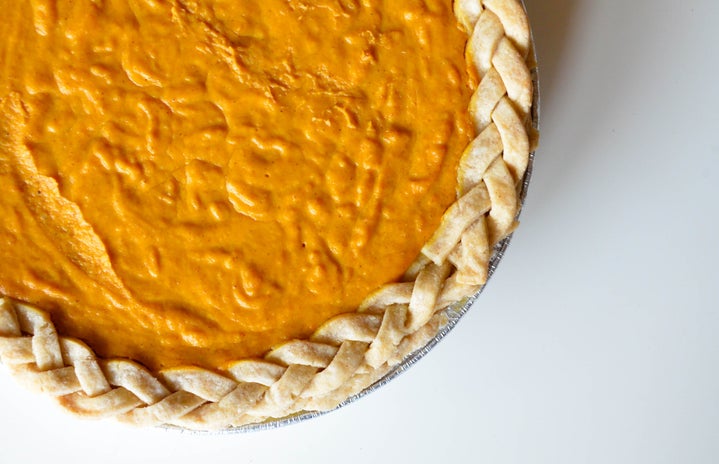
It’s almost the end of October with the weather turning and staying grey, the trees shedding their variegated foliage, and the resurrection of fuzzy socks. Halloween is fast approaching and with it, pumpkins!
More specifically, pumpkin pie.
I love pumpkin pie almost as much as I love making pumpkin pie from scratch.
Two years ago, I stumbled into a Trader Joe’s, bright-eyed and bushy-tailed and entirely unaware of the life-changing discovery I would soon make.
Pie pumpkins.
You see, pie pumpkins, also known as sugar pumpkins, are my secret ingredient for the perfect, mouth-watering pumpkin pie.
Now, before you get excited and start eyeing your jack-o-lantern, let me impart some hard-earned wisdom: a carving pumpkin is not a pie pumpkin.
You can carve a pie pumpkin but you cannot make a pie from a carving pumpkin.
Well, you can, but it won’t turn out very well. Trust me, I tried. It was savory and lumpy and so wrong that I almost never roasted a pumpkin for pie again.
But with some persistence and a bit of Googling, I quickly realized my mistake.
I used a carving pumpkin instead of a pie pumpkin and boy oh boy, was that a mistake that I will remember for the rest of my life.
Pie pumpkins tend to be smaller and the gourds are taller than they are wide. They also have thicker skin, making them more difficult to cut compared to carving pumpkins.
But the real difference is the flesh.
Pie pumpkins have a thicker layer that you cook then scrape out and puree for your pie filling. It’s also sweeter, the flavor more subtle and fragrant than overwhelmingly earthy like cut pumpkins that is a quintessential Halloween memory.
So there I was in Trader Joe’s, wandering the aisles when I stumbled across a box of perfectly ripe pie pumpkins.
You know I bought one.
As well as a can of evaporated milk, a box of graham crackers and a package of butter.
Then, I went home and made the best pumpkin pie of my life.
It wasn’t anything fancy, just pumpkins, milk, eggs and spices. But, there’s something that stands out about fresh pumpkin that you can’t duplicate with canned pumpkin.
If you are willing to venture out and buy a sugar pumpkin, I’ll teach you how to make some quality pumpkin pie. If you don’t have time or don’t want to risk losing a finger for pumpkin puree, canned pumpkin works just as well.
How to Make Fresh Pumpkin Puree
Ingredients
- One medium-sized pie pumpkin
Directions
- Preheat your oven to 350℉
- After you’ve selected your pumpkin, go ahead and rinse it. Pat it dry and place it on a cutting board and turn your pumpkin onto its side. I prefer to cut it straight down the top, dividing the stem in half, but you can also cut it through the widest part. Using a large, sharp knife (make sure the knife is sharp so it doesn’t slip and cut you), push the blade straight into the pumpkin. Think Billy and Stu stabbing their victims in Scream. At first, you should feel resistance from the skin and flesh, but then it will give away to the membranous interior. Stop pushing when the knife is about halfway embedded, you want the extra leverage to cut around the pumpkin. Carefully place your hand above the cut you’ve made and push the knife down at an angle towards the flat bottom, the part of the pumpkin that typically rests on the counter.
- Once you’ve cut through the bottom, carefully pull the knife out and turn it the other way to cut through the stem. You can hold the bottom of the pumpkin in your other hand if it makes it easier to make the cut. Finally, cut through the far side of the pumpkin to separate the two halves.
- Grab a spoon and start scooping seeds. You want to be generous and scrape all of the stringy membrane from the interior of your pumpkin.
- Place the halves cut side down onto a baking tray and put them into the oven for about an hour and a half. You will know they are done when they smell like pumpkin and there is little resistance when you insert a knife. * If you do not have an oven, you can cut the pumpkin into smaller pieces and steam them in two inches of water for about twenty minutes or until tender. I check every ten minutes just to make sure there is still water in the pot. Once they are soft enough to smush with a fork, go ahead and kill the heat. * Whichever method you choose to cook your pumpkins, go ahead and let them cool before you handle them. They will be hot!
- While the puree is cooling, crush one sleeve of graham crackers. Brown your butter over medium heat until it is golden brown and nutty. Place half of it into a mixing bowl and let it cool. Pour the graham cracker crumbs on top and mix until the crackers have the consistency of wet sand. Press the mixture into a 9-inch pie pan and place in the oven for about five minutes to set the crust.
- While the crust bakes and cools, use a spoon to scrape the pumpkin from its skin. You can use the same bowl you made your crust in to save time washing dishes. It will be a bit easier with the roasted pumpkins because the skins will be tougher. If the steamed pumpkins are refusing to cooperate, you can use a fork to mash the pumpkin right in the skin and your hands to separate the puree. One Trader Joe’s sugar pumpkin yields about two cups of puree, all of which we will be using. I like to use a potato masher to make my puree but a fork works just as well.
Now that we have our pumpkin, onto the pie!
How to Make a Pumpkin Pie from Scratch
Ingredients
- Puree of one medium pumpkin (or 15 oz can)
- 1 sleeve graham crackers
- 2 sticks butter, browned
- 2 large eggs
- 1 can evaporated milk
- 1/2 cup dark brown sugar, packed
- 1/3 cup granulated sugar
- 2 tsp cinnamon
- 1 tsp ground ginger
- 1/4 tsp ground nutmeg
- 1/4 tsp ground cloves
- 1/2 tsp salt
Directions
- With your oven still set to 350℉, begin assembling by thoroughly whisking two eggs with a can of evaporated milk and add it to your puree. Add the sugar, spices, salt and butter. Blend it all together and add it to your cooled crust.
- Bake the pie for an hour or until the center still jiggles slightly when you shake the pan. You don’t want to overcook the pie because it will set as it cools. Take the pie out of the oven and let it cool to room temperature before placing it in the fridge to cool completely.
- Cut your pie into as many or few pieces as you wish and serve with freshly whipped cream or a scoop of vanilla ice cream. Lifehack: run a large knife under hot water for clean cuts worthy of being served in a restaurant.
- This pie is good for about a week in the fridge or indefinitely in the freezer, but it won’t last that long because it’s so freaking good. You can eat it cold or put it in your toaster oven or microwave to reheat.
Enjoy and happy baking!


