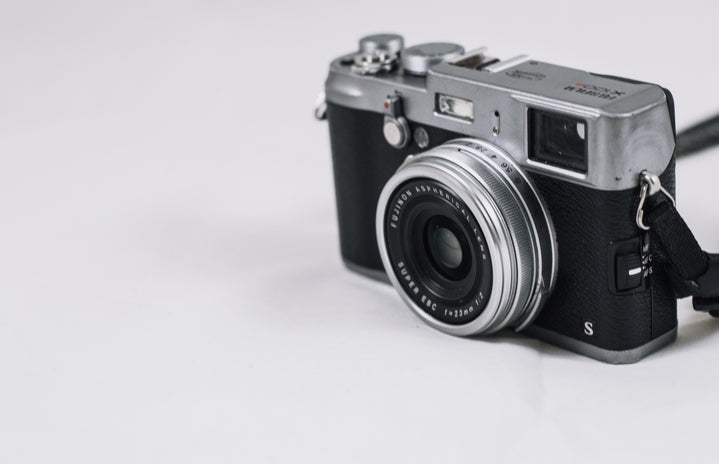
In the past few years, film photography has increasingly become popular again. This is likely due to its authenticity, rich images, and overall aesthetics. Even if an image is imperfect, you can still appreciate it for what it is. There’s a lot to learn when it comes to shooting film, and it takes time as the practice feels more “handmade” as opposed to digital photography which may seem “machine-made.” It’s important that you get to know your camera and its features, as well as what type of film to use. From an amateur film photographer to another, below is my beginner’s guide to familiarize yourself with this.
Types of 35mm film cameras you may come across:
SLR: Most commonly used and better for beginners. These cameras are the film equivalent of the DSLR (digital). It has the same internal mirror mechanism that allows you to look straight through the lens and see a near-exact approximation of what the image will look like. SLR cameras also allow you to swap lenses for better control of your shots.
Rangefinder (I use this kind): A notable feature of this camera is that it calculates distance through triangulation for accurate focusing. It uses a mechanism that involves a compact revolving mirror and two windows, and is used for focusing rather than viewing the scene to be captured. Unlike the SLR, a rangefinder does not allow you to look through the lens, but through a small window on the upper right side (in the same way you would with a point-and-shoot camera). These are also much smaller in size.
Point and Shoot: Very compact, lightweight, and does not require any skill. The camera controls focus and exposure settings automatically and has a fixed focal length lens so you won’t be able to zoom in or out. They are straightforward to use, as all you need to do is point and shoot. These can also be sold as disposable cameras, which you would not be able to reload with new film.
When it comes to choosing the 35mm film to load your camera with, there are many different options to choose from, whether it be in color or black and white. You’ll also notice that it will include a number of exposures, which means how many pictures you can take with that roll of film. Rolls of film can differ in how they look once developed, so it’s important to experiment and find what you love most and fits your style.
When looking into film, you should be mindful of its ISO, which you can see this number on the packaging of your film (this could show as 200, 400, or even 800). This is the film speed and it refers to the film’s sensitivity to light. A higher ISO indicates a faster film speed and will allow you to take better photos indoors or in low lighting, while a low ISO indicates a slower film speed and may work best in daylight. The higher your ISO, the more visible grain as well. It’s recommended to start off with an ISO of 400 as it captures most types of light.
The next thing to know is aperture, which controls how much light is let through. A lens works like an eye and has an iris. The larger the aperture, the wider it opens and more light is let through. The smaller the aperture, the less light is let through. With this in mind, the actual number sequence on your camera that controls the aperture may be confusing as it’s numbered the opposite way. The smaller numbers are for a larger aperture, and the bigger numbers are for a smaller aperture. Your aperture of choice can also define your depth of field, which is the amount of the photo that is in focus. An example of this is how much blur is in the background of the photograph.
Shutter speed controls the shutter inside your camera by determining the time in which it opens and closes, allowing light to travel to the film behind it. A slow shutter speed lets light through for a longer amount of time, and a fast shutter speed lets light through for less time. A faster shutter speed is best for freezing any movement in your subject, so the faster the subject is moving, the faster the shutter speed is needed to capture it as is. With a slow shutter speed, you are likely to capture motion blur if your subject is moving, or if your camera was not held still enough. A slower shutter speed would work well when shooting night photography to allow more light. If shooting at night, you’ll need to look into a tripod, flash, cable release/self timer, and that your film may work okay in that lighting.
Now that you know these three things and the relationship between them, we can move on to getting your film developed and scanned. You’d be able to take your film to a local film lab or find one online that you may be able to ship to. You can choose to develop only, meaning you’d receive only your negatives back, or you can scan which would allow you to have your film sent back digitally which is perfect for posting. I personally prefer doing both for safe keeping, in case I lose any of the digital ones and would like them scanned again. Keeping your negatives is also useful if you are learning to make your own prints.
I hope this beginner’s guide helps you if you are interested in picking up film photography! Below is a helpful chart I used to visualize the functions of ISO, shutter speed, and aperture. Best of luck!


