Everywhere you look on social media, people are dying their hair. It’s as if we’ve collectively decided that changing our hair color (or watching other people do it) is the best way to stay entertained during the coronavirus. If you’re thinking about jumping on this trend, check out some of these tips.
But first, a quick warning. I’m not a hairdresser, and neither are you (unless you are, but then you don’t really need this article). Any hairdresser would tell you doing your own hair color at home is risky and usually not a good idea. It’s a chemical process and can take a lot of time and money to correct if things don’t go as planned. Best case scenario, you get a new look you really like. Worst case scenario, your hair breaks off. Still want to do it? Keep reading.
- Know If Your Hair is Compromised
-
No matter what color you want your hair to be, first you have to determine if your hair is compromised. Basically, this means knowing if your hair has undergone any chemical treatments such as bleaching, perming, relaxing, etc. If your hair is bleached or otherwise chemically treated, DON’T try to lighten it at home. Stay away from bleach completely, since only a professional hairdresser could tell you if your hair could handle it. Adding bleach to pre-lightened or processed hair could result in the hair becoming stringy or elastic. Even worse, it could mean that the hair breaks off completely.
If your hair isn’t chemically treated or lightened, then you have virgin hair. This means it’s in it’s most natural state, and your hair hasn’t been previously damaged by any chemicals. This is the best state for your hair to be in if you want to lighten it at home.
- Determine Your Hair Level
-
Hair level refers to how light or dark your hair is. Most hair level scales are on a 1-10 range, going from black to light blonde. If your hair is dark, falling in the brown and black range, many colors won’t show up on it without some kind of lightener. If your hair is a shade of blonde, then more colors will show up without extra processing.
Basically you can’t expect to go from your natural dark brown hair to a light pink without a lot of time and bleach.
- If You Want to Go Lighter… But You’re Scared of Bleach
-
One way to go a few shades lighter can be with permanent hair color. This isn’t going to make your hair drastically lighter, but instead it lifts your hair’s natural pigments to deposit the color into your hair. I personally used to do this to dye my hair magenta from its natural medium brown. Permanent hair color, however, usually requires a 20 volume developer (more on that later) and can be somewhat damaging to your hair. While it isn’t as damaging as bleach, it is important to follow individual hair color brands’ instructions on use and mixing ratios for developers.
- If You Want to Go Lighter… and Bleach Doesn’t Terrify You
-
Now let’s get into bleach. It’s damaging. It’s hard to do at home if you’re new to at-home hair color. No hairdresser recommends doing it yourself.
The first thing you should know about is developers. I mentioned these with the permanent hair color, but with bleach they’re even more important. They typically come in 10, 20, 30 and 40 volume. A 10 volume developer gives very little lift, taking it only a few levels lighter. It isn’t used for much except when a hair dye specifically calls for it, or it’s diluting another developer. A 20 volume developer is used to mix with permanent hair color and provides a few levels of lift for this specific purpose. When it’s mixed with bleach, it will lighten hair a few levels depending on what you started with. A 30 volume developer mixed with bleach is more typically used to take medium-dark brown hair to blonde. If applied correctly to undamaged hair, there’s a lower chance of damaging your hair with this. Stay away from 40 volume developers if you’re trying this for the first time. It’s the strongest and most damaging developer, and it should only be used by someone who knows what they’re doing.
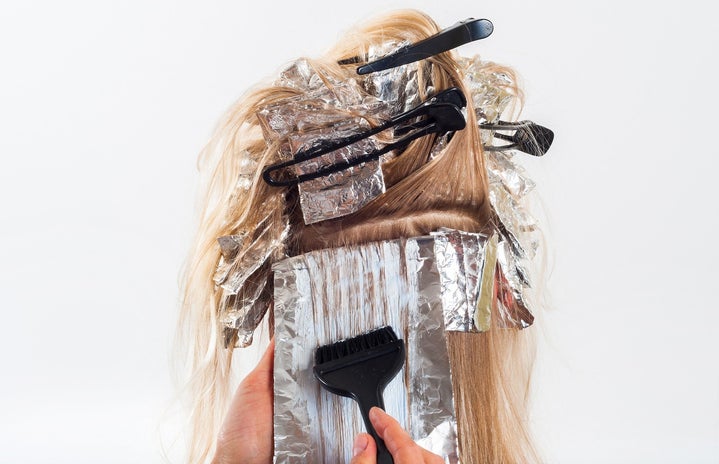
The next step is application. Part the hair into manageable sections (I usually do 4 sections) and take ¼ inch sections that you’ll apply the bleach to generously. Cover the hair as completely as possible to prevent any dark spots or unevenness. For longer hair, apply bleach to the middle and ends of your hair, and then go back and do the roots. The heat from your head will make the bleach process faster and your roots might end up a lot lighter than the rest of your hair otherwise. Depending on what brand/type of bleach you use, follow directions on how long to leave it on for. Typically don’t exceed 40 minutes to prevent damage.
If your hair isn’t as light as desired, another round with the bleach might be necessary. Be extra careful if you decide to do this because if the hair gets over processed it can break off. Use a lower developer or leave the bleach on for a shorter amount of time to prevent this.
Another thing to remember is that bleach reacts differently on different hair textures, so do specific research into hair coloring for your own hair texture.
- Toner, Anyone?
-
You bleached your hair, and now it’s yellow. A toner can help with this and is necessary if you want your hair to be a natural-looking blonde shade. Most toners call for a 20 volume developer to be mixed in. Research the shades of toner beforehand, because it may not work on reducing the yellow shades in the hair if it’s meant to be applied to a different hair level. For example, applying a platinum silver toner to dark yellow/orange hair isn’t going to make you platinum blonde. It’s meant to go on already very light hair.
- If You Want to Go Darker…
-
Going from a lighter hair level to a dark one is easier than the other way around; however it is still a process. One option is using box dye (shoutout to Walmart), which has the ability to lift your natural hair color and deposit the darker color. This is the most cost effective, but box hair dye still has the potential to damage your hair.
Another option is permanent hair dye, which is hair color usually mixed with a 20 volume developer to allow the color to penetrate your hair and not fade out as you wash it.
There’s also demi-permanent hair dye, which also gets mixed with a developer. It isn’t as damaging to your hair, is easy to do if you’re going darker and will fade out faster than the permanent hair color. If you aren’t fully committed to the idea of changing your hair color for the long term, there’s semi-permanent hair color which will fade out the fastest. It will still be visible in your hair for a couple of weeks, but unlike the other options, it doesn’t damage your hair at all.
- If You Want a Bright Color
-
If you want to go all in and have hair that’s an unnatural, Skittle-like color, refer to all of the steps before this. Know your hair level so you don’t try and dye your black hair lavender. You have the option of bleaching it and then applying a demi-permanent or semi-permanent hair color. Choosing to do fun color after bleaching your hair also means you usually don’t have to use a toner.
You can also use a permanent hair color to lift your natural hair and deposit the color in. I spent about a year doing this so I could have the magenta/fuschia hair of my dreams. It is damaging in the long run, so consider demi-permanent colors depending on how dark your hair is.
For anyone with pre-lightened hair or naturally light hair, semi-permanent color is the way to go. Currently I have pre-lightened hair, and I’m in love with Arctic Fox’s line of semi-permanent colors. They have no ammonia, aren’t damaging and they smell amazing (not to mention they’re vegan and cruelty-free). For me personally, the colors fade out within about a month (depending on how often I wash my hair), making it easy for me to go to the next color. As I write this, my new bottle of their blue shade Poseidon is staring at me, and the little purple left in my hair should mix in nicely with the blue.
- Make Sure You Have Your Supplies
-
Don’t go into this unprepared. Make sure you or whoever is doing your hair is wearing gloves. I speak from personal experience; having red stained fingers isn’t cute. If you’re using bleach, this is even more important because it can actually give you chemical burns.
Have on a shirt you don’t care about, a towel around you, or an actual cape. You should also have a mixing bowl and brush on hand, as well as some hair clips to section your hair off. If this is your first time dying your own hair, a good tool to have on hand is a friend. You can’t see the back of your own head, and if the process starts to get overwhelming, call for some help.
These are some basic things to consider when coloring your hair and shouldn’t be taken as a set of hard rules. Do your research if you plan on making a drastic change to your hair. I recommend looking for hairdresser tutorials on YouTube and Instagram as they offer helpful tips. I also like using the Sally Beauty app, which gives full product instructions and proper use guides. Purchasing products directly through the app is also very easy, but shipping may take a little longer than usual due to the coronavirus.
Comment down below if this was helpful. And if it wasn’t … at least we’re not supposed to go outside right now anyway.


