

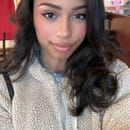
Fall has finally arrived! It is time for everyone to put away their shorts and grab their hoodies. The leaves are turning that beautiful brown and orange color and Starbucks is releasing their famous pumpkin spice latte again. It looks like everyone is ready. But oh no… What are we going to do with our curls??
As the weather gets cooler, our curly heads are more susceptible to dryness and breakage. We have to pay extra attention to our curls while still being able to style it in a quick and easy manner. I know I’ve struggled with this in the past and after a lot of trial and error, I’m giving you my tips for styling hair for the cool fall weather.
I made this number one because it is my all-time favorite, go-to hairstyle which always earns me so many compliments and never takes more than 10 minutes to do! This hairstyle works for every hair type so don’t be discouraged to try it. You will need a detangling brush, a regular brush, four rubber bands, your favorite gel, and a curl mousse.
First, section your hair into two parts. Wet your hair a little using either water or a water-based leave in conditioner for extra moisture. Then use your detangling brush to get your hair smooth and knot free. Then take some gel and apply it to the two parts of your hair. You can either cornrow your hair into the buns or just slick it down as it is. Sometimes I will leave out two curly pieces for bangs. Use the brush to slick down your hair and create two ponytails using two rubber bands. Put the mousse on the ponytails and put each ponytail into one twist. Then wrap each twist around the rubber band and secure them using the other two rubber bands.
You can style your edges if you want to be a little fancier, or you can get tiny butterfly/flower clips and place them all over your mini hair buns. This is a hairstyle I will typically do with day 4 or 5 hair because it’s the simplest way to keep it moisturized and cute without having to use too many products.
This is also one of my favorite hairstyles ever that I would love to see more curly girls wear. It’s definitely an amazing style for girls who like to stretch their hair. You will need a detangling brush, mini bands, two rubber bands, your favorite gel, a regular brush, four claw clips, and a comb.
First things first, use your comb to separate your hair into four even sections like a cross. Choose a top section you want to start with and clip the rest away. Wet the section you chose with water or a leave in conditioner and use your detangling brush to get rid of any knots. Next, take some gel and apply it all over the top section you chose. Next split that section into four more parts horizontally. If you want to make it simpler you can do two or three. Take the first mini part and tie it, into a ponytail using the mini rubber band. Repeat with the next mini part except this time you are also tying the ponytail from before into that next part. Unclip the bottom section of your hair with the corresponding side you’re working on and keep repeating the steps. Since my hair is kind of thick, when I get the the bottom section, I use a regular sized rubber band and tie it into one big ponytail. I then take the mini rubber bands and tie about five of them down the braid.
Finally, I pull the sections between the rubber bands starting from the top section all the way down to make the hair look lifted and more like “bubbles” (see where the name comes from?). Repeat on the other side. You can style your edges if you want, or you can put small clips on the “bubble” parts of your hair to further enhance the style. While it may seem like a lot to do this style, I promise it gets so easy once you get the hang of it and I love doing my hair this way for special events and parties. This is also a great style if you don’t want to do your hair for the next couple of days as the style lasts for a good amount of time.
The title makes it sound complicated, but I swear it’s so simple and looks super cute. I get so many compliments whenever I wear my hair this way. You are going to need a detangling brush, a curl definer or gel, two rubber bands, and a regular brush.
First, separate your hair into two sections horizontally the way you normally would if you were putting your hair in a half up-half down hairstyle. If you like a lot of hair on the bottom make that section bigger, if not, keep it even. Just make sure you leave enough room on top to make two big braids or twists. Second, take the top section of the hair and separate it into two sections vertically. You can either do a middle or side part. For this style, I love a side part! Wet the top section with water or a water-based leave in conditioner. Use your detangling brush to detangle your hair. Use your gel or curl definer and apply it to the top section of the newly detangled hair. Then, put each section into ponytails using the two rubber bands. You can then either braid the ponytails or do what I do and separate the ponytails into two sections and braid each section. You would then have 4 braids in total with two braids per section. Take the back part of your hair and apply water or a water-based leave in. Then add your curl definer or gel and voila! You are done. With this hairstyle once again, you can jazz it up by doing your edges and adding your favorite mini clips to your braids on top!
These are some of my favorite fall hairstyles and hopefully they will be your favorites too. Don’t ever be afraid to experiment with your hair because curly hair is capable of so many beautiful styles. If a style looks too complicated, don’t shy away! Get a friend to help or find a day dedicated to practicing curly hairstyles. Let’s show everyone what these curls can do! Thank you so much for reading my article and I hope you learned a lot!