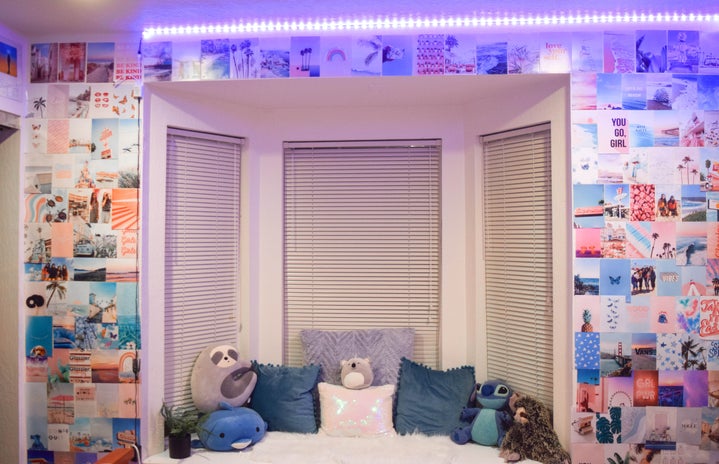
One of the biggest ongoing trends, seen on Instagram, Tik Tok and Pinterest, is putting up a themed collage wall in your room. This trend appeared as a budget-friendly alternative to ready-made collage kits, which cost around $90-100. Instead, you can easily make it yourself and customize it the way you want for less than half the price. I recently redecorated my room and tried it out myself! Here’s a step-by-step tutorial on how to make one.
1. Find an empty wall and measure it!
- Find a wall where you want to make your collage on and measure its length and width.
- If you are going to be printing 4X6 pictures (landscape), divide the height of the wall area by four and its width by six. Then multiply those numbers together and that’s how many pictures you will need to find and print out for your wall. Do the same math if you want to print 8X10 photos or 5X7 photos.
- It is always a good idea to print out a couple more than you think you will need just in case.
- If you plan to make the collage reach the floor/ceiling, you may find issues being able to fit everything perfectly and have to adjust accordingly.
My wall is a mix of 5X7 and 4X6 photos, but most of them are 4X6 because they are cheaper to print!
2. Figure out a theme for your wall and find pictures!

- If you already have a theme in mind, that’s great! Skip to the next step. If not, here are some fun ideas:
- Pink and Blue: This is the theme I chose! It’s super fun and girly. I searched “pink and blue pics”, and “Disney pink and blue” on Pinterest to find my pictures. I made a few boards that you can check out on my Pinterest.
- Black and White: This theme includes all black and white pictures! It is especially easy to do because you can apply a black and white filter to any photo that you like, and still have a cohesive collage.
- Pastels: This theme is very colorful, but not too loud and distracting! Search up “pastel aesthetic” on Pinterest to find cute pictures that fit this color scheme.
- Rainbow: This theme involves photos for every color of the rainbow, and arranging them in rainbow order on your wall. A really popular example of this kind of collage wall is this TikTok!
Finding pictures on Pinterest and Google is the best way to go; you can just search the aesthetic/color scheme you’re looking for and add “collage wall” to it (i.e. cottagecore collage wall). Find the number of photos you need (some extra, just in case!) and save them. I suggest finding a mix of quotes, pictures, and patterns for your wall. You can even add your own personal pictures if they match well. Remember to choose photos that are landscape/horizontally oriented!
3. Save each photo and print them out!

Next, save all the photos to the device you will be buying them on, and upload and purchase them! Here are a few websites that you can use to print your photos:
- Walmart Photo: 4X6 photos cost $0.09 each. You can print 100 photos for under $10!
- Shutterfly App: On the Shutterfly app, you can print unlimited photos for FREE! However, you do need to pay the shipping cost, which is around $10.
- Amazon Prints: If you want your prints fast and have Amazon Prime, you can use Amazon Prints. 4X6 photos cost $0.12 and with Prime, they ship within 3-5 days.
4. Put the pictures onto your wall!

This step is probably the hardest and most time-consuming part of making a collage wall. Some important things to know:
- It helps to arrange your photos before putting them on your wall! Laying them out and figuring out how to place the photos will make your collage wall cohesive and cute!
- I don’t suggest using normal tape to put the pictures on to the wall, because they will definitely fall off. I recommend using Scotch Indoor Mounting Tape, available on Amazon and Home Depot. I used around four packs.
- I cut the tape into squares and put it on all four sides of the back of the photo, to make sure they stayed fully attached to my wall.
- Once you’ve applied your choice of adhesive, start lining up and sticking your photos to your wall! Keep doing this until your entire wall is covered.
5. Enjoy your collage wall!
Now that you’ve put hard work into making a personalized, inexpensive collage wall, enjoy it! My suggestion is to use it as a backdrop for your selfies or just admire the work you have done. Tag us in your adorable collage wall selfies @HerCampusSJSU on Instagram!


