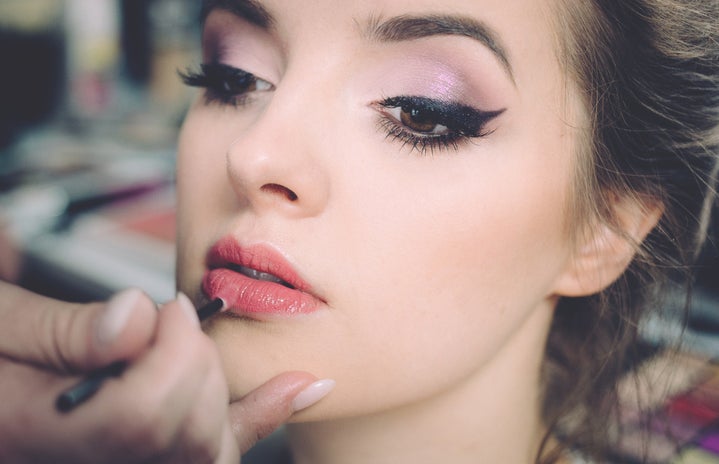
I love makeup. I do it pretty much every single day. Yes, I’m that girl who comes to class with her makeup done everyday, sorry about it. For me, it’s a relaxing part of my mornings and has developed into one of my hobbies. I’ve been doing makeup since middle school, but only got into it this way during my senior year of high school. Though my favorite products and routine are always changing, this is my current makeup routine!
Step 1: Skincare Routine
This is arguably the most important part of any makeup routine!!!!!!!!! If you don’t start with a clean and moisturized face, you skin will be having a rougher time by the end of the day. Though I could write a whole article about this, the most important parts are washing your face and then moisturizing your skin. But seriously please take care of your skin. I mean come on, it’s really hard to decorate a cake if it’s unbaked right? All right, moving on to why you’re reading this article.
Image credit: https://cupcakesandcashmere.com/beauty/what-my-makeup-and-skincare-routine-looks-like-right-now-anne
Step 2: Prime
Lately, I’ve been using Stila’s One Step Prime. It’s a very light and hydrating primer (which I need because my skin tends to be on the drier side). Though primer is not needed, I like it because I’ve noticed a difference in the longevity of my makeup. Without it, I notice my makeup creasing easier and looks more cakey throughout the day.
Image credit: http://www.raincouverbeauty.com/2017/09/stila-one-step-primer-correct-review.html
Step 3: Foundation
Though I’ve been through my fair share of foundations, I’ve been using No. 7 Stay Perfect Foundation SPF 15 for a while now. This is a nice, pretty buildable foundation that gives you a solid medium coverage. I prefer to use a beauty sponge to apply it (and get it damp if I actually feel like getting up), but if you prefer using brushes to apply foundation, then go for it. Let me tell you, this baby has lasted through some of my days working at summer camp. If that’s not impressive then I don’t know what is. (Also, note that this image is NOT the full shade range)
Image credit: https://samanthaschuerman.blogspot.com/2016/04/no7-stay-perfect-foundation-review.html
Step 4: Concealer
So, I’ll be honest, I’ve had a tough time finding a good concealer for a while now. The best one I’ve been able to find though is Tarte’s Double Duty Beauty Shape Tape Contour Concealer. I know, I know, this one is a holy grail product, but it is for a reason. If you set it, it rarely creases and the creases that do appear are easy to blend away. I also like to apply this one with a beauty sponge, but brushes work too. I know this product is a little spendy, but there are some dupes. One “dupe” that Makeup Revolution put out is said to be pretty spot on, but the only downside is that you get a lot less product (⅓ in fact), but it is a lot cheaper. However, I have not tried it so I cannot say if the smaller sizes are worth the cheaper prices.
Image credit: https://people.com/style/tarte-cosmetics-shape-tape-concealer-sale/
Step 5: Brows
Once I have my face on, I like to move onto my eyebrows. Now, eyebrows give me a lot of stress because they can go wrong so fast; however, I have been using Morphe’s brow cream for a while now, and absolutely love it. Not only is it extremely affordable, but it also looks great and lasts forever. I apply the cream with one of Morphe’s angled brow brushes as well. If it’s looking a little too thick, I like to take a little spoolie brush to break down the color intensity a bit.
Image credit: https://twitter.com/makeupbydianis
Step 6: Eyeshadow
Ok so, this step is a big SOMETIMES. Because listen, some days you just don’t need shadow. But if I’m doing eyeshadow, I always start with priming my lids. Just regular primer will work, but I prefer to use Smashbox’s Photo Finish 24-Hour Shadow Primer. It’s a little spendy, but honestly I’ve had the same bottle since high school now, so I feel like it’s worth it because you only need a little bit of product. Anyways, once I prime I always put down a neutral color first and then dive into the ~look~ I’m going for that day. Two of my favorite palettes right now are Jeffree Star Cosmetics’ Thirsty Palette and Tarte’s Tartelette 2 In Bloom Clay Eyeshadow Palette. Again, I could make a whole article on eyeshadow looks, so I’ll leave it here for now.
Image credit: https://www.pinterest.com/pin/550635491936514545/?lp=true
Step 7: Eyeliner
This is also optional for me, because sometimes I’m just not feeling some liner. But either way, I do love to use it when I’m vibing and I have found the eyeliner to end all eyeliners. I stumbled upon EM Cosmetics’ liquid illustrative eyeliners through my ipsy bag and I have never gone back. It is literally perfect. It doesn’t smudge. It lasts all day. It’s super small and precise. Literally perfection. I’ve used both the felt tip and brush tip liners and love both of them. Usually I go for a little wing and these work perfectly for that. Sometimes, I will also tightline with a kohl eyeliner on my upper waterline, but I don’t do this unless I want a really full lashline.
Image credit: https://www.allure.com/review/em-cosmetics-matte-gel-eyeliner-pencil
Step 8: Mascara
This step is kind of boring, but I definitely do it every day to pull the look together. I’m pretty picky about my mascaras and usually reach for Too Faced’s Better Than Sex Mascara, but I also like Tarte’s Lights, Camera, Lashes 4-in-1 Mascara. I find both of these are pretty good at adding volume without getting too clumpy.
Image credit: https://www.glamour.com/story/a-love-letter-to-too-faceds-ne
Step 9: Highlighter
This is one of my favorite steps of my makeup routine. Though I’ve been through many highlights in the past, I’ve recently found some new favorites. Some favorites include Morphe’s High Impact Highlighter and OFRA Cosmetics’ OFRA x Madison Miller Sea Shimmer Highlighter. I’m a big fan of highlighter, so I always go for it when applying it. Making sure you get the high points of your face is a good way of thinking about where to highlight–the tops of your cheekbones, brow bone, tip of your nose/along the top of it, the inner corner of your eyes, and cupid’s bow are all good options.
Image credit: https://www.ofracosmetics.com/blogs/ofra-blog/team-does-looks-w-madison-miller-products
Step 10: Set!!!
Now, to tie it all together, set the look. Not only will setting it help the makeup last all day, but it will also help keep a little moisture locked in to help you get through the day. My ride-or-die setting spray is Morphe’s Continuous Setting Mist. It holds makeup all day and is super refreshing on your skin. Plus, it comes in a cool aerosol can, so you can just hold down the button to spray it continuously. If the finish is a little too dewey though, I’ll take a light dusting of Maybelline’s Fit Me Loose Finishing Powder to settle everything down.
Image credit: https://www.cosmopolitan.com/uk/beauty-hair/makeup/a23008728/morphe-setting-mist/


